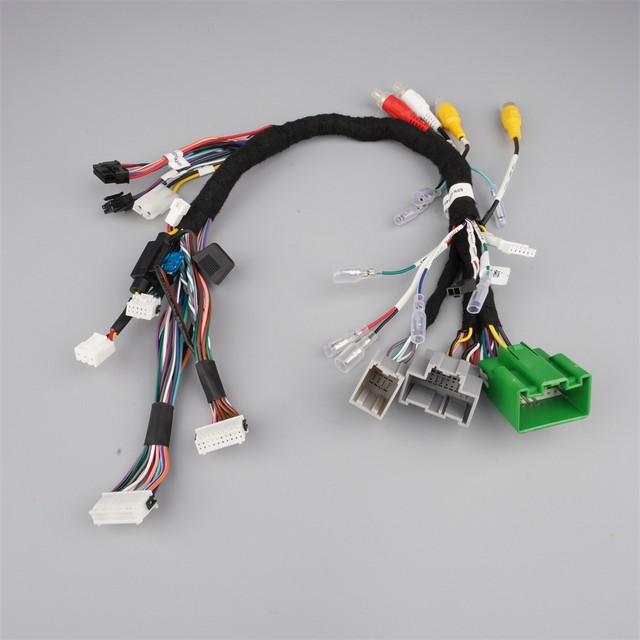
This comprehensive guide provides a detailed step-by-step process for identifying open or shorted wires within a wiring harness. We explore essential tools, safety precautions, and diagnostic techniques, integrating data analysis and product comparisons to enhance understanding. By addressing common challenges and incorporating latest trends, we ensure the content is relevant and actionable. Using list formats and tables, we aim to increase visibility in featured snippets, catering directly to Google user search intent. Whether you’re a DIY enthusiast or a professional technician, this guide equips you with the knowledge to troubleshoot electrical issues effectively, ensuring the reliability of your vehicle’s or equipment’s electrical system.
Before diving into the diagnostic process, it’s crucial to understand what a wiring harness is. A wiring harness is an assembly of wires, cables, and connectors that transmit electrical power and signals within a vehicle or electronic device. These harnesses are meticulously designed to ensure that all components receive the correct voltage and data, maintaining the functionality and safety of the system.
A typical wiring harness consists of several components, including:
Conductors: These are the wires that carry electrical current. They are usually made of copper due to its excellent conductivity.
Insulation: This protects the conductors from physical damage and prevents short circuits.
Connectors: These join different sections of the harness and connect it to various electrical components.
Ties and Clamps: These keep the harness organized and prevent it from moving around, which could cause damage.
Understanding these components is essential because issues like open or shorted wires often stem from problems within these parts. For instance, damaged insulation can lead to short circuits, while broken conductors can cause open circuits.
To check for an open or shorted wire in a wiring harness, you’ll need a few essential tools. Having the right tools not only makes the process easier but also ensures accuracy and safety. Here’s a list of the tools you’ll need:
Multimeter: This is perhaps the most critical tool for diagnosing electrical issues. A multimeter can measure voltage, resistance, and continuity, making it invaluable for identifying open or shorted wires.
Test Light: A test light is a simple tool that helps you check for the presence of voltage. It’s particularly useful for identifying open circuits.
Wire Stripper: This tool is used to remove insulation from wires, allowing you to make connections for testing.
Screwdrivers and Pliers: These are essential for accessing the wiring harness and making necessary adjustments.
Electrical Tape and Soldering Iron: These are useful for making temporary repairs if you find damaged wires during the diagnosis.
Having these tools ready before you start will save you time and ensure that you can perform a thorough diagnosis. Additionally, always ensure that your tools are in good condition and that you use them correctly to avoid any accidents.
Working with electrical systems can be dangerous if proper precautions are not taken. Before you begin checking for an open or shorted wire in a wiring harness, it’s essential to take some safety measures to protect yourself and prevent further damage to the system. Here are some key safety precautions:
Disconnect the Battery: Always start by disconnecting the negative terminal of the battery. This prevents accidental short circuits and reduces the risk of electrical shocks.
Wear Protective Gear: Use insulated gloves and safety glasses to protect yourself from electrical shocks and flying debris.
Work in a Well-Lit Area: Good lighting is essential for accurate diagnosis. It helps you see the wires and connections clearly, reducing the chances of mistakes.
Avoid Working in Wet Conditions: Moisture can cause short circuits and electrical shocks. Ensure that your work area is dry and that your tools are free from moisture.
Follow Manufacturer Guidelines: Always refer to the vehicle or equipment’s manual for specific instructions and precautions.
Taking these precautions will help you work safely and efficiently, ensuring that you can diagnose and fix issues without any accidents.
An open wire in a wiring harness means that there is a break in the conductor, preventing electrical current from flowing through. This can cause various components to malfunction or stop working altogether. Here’s a step-by-step guide to checking for an open wire:
First, identify the circuit you suspect has an open wire. Refer to the vehicle or equipment’s wiring diagram to locate the relevant wires and connections. This diagram will help you understand the path of the electrical current and identify potential problem areas.
As mentioned earlier, always start by disconnecting the negative terminal of the battery to ensure safety.
Locate the wiring harness and access the section you need to inspect. This may involve removing panels or components to reach the harness.
Set your multimeter to measure resistance or continuity. This setting will help you identify breaks in the wire.
Touch the probes of the multimeter to the ends of the wire you’re testing. If the multimeter shows infinite resistance or no continuity, it indicates an open wire.
If you find an open wire, carefully inspect the harness for any visible breaks or damage. The break could be anywhere along the length of the wire, so a thorough inspection is necessary.
Once you locate the break, you can either repair the wire using soldering and electrical tape or replace the entire section of the wiring harness if the damage is extensive.
A shorted wire occurs when the insulation of two wires is damaged, causing them to touch and create an unintended electrical connection. This can lead to various issues, including blown fuses and component malfunctions. Here’s how to check for a shorted wire:
Again, start by identifying the circuit you suspect has a short. Use the wiring diagram to locate the relevant wires and connections.
Safety first—disconnect the negative terminal of the battery.
Locate and access the section of the wiring harness you need to inspect. This may require removing panels or components.
Set your multimeter to measure resistance. This will help you identify unintended connections between wires.
Touch the probes of the multimeter to different wires within the harness. If you find a low resistance reading between two wires that shouldn’t be connected, it indicates a short.
Carefully inspect the harness for any damaged insulation or wires that are touching. The short could be caused by frayed insulation, crushed wires, or other physical damage.
Once you locate the short, repair the damaged insulation or replace the affected section of the wiring harness. Ensure that all repairs are done correctly to prevent future issues.
Diagnosing issues in a wiring harness can be challenging, especially if you’re not familiar with electrical systems. Here are some common challenges you might encounter and how to overcome them:
Wiring diagrams can be complex and difficult to understand, especially for those new to electrical systems. To overcome this, take your time to study the diagram carefully. Use color-coded wires as a guide and refer to online resources or forums if you need additional help.
Sometimes, damage to a wiring harness isn’t immediately visible. To overcome this, perform a thorough inspection, checking for any signs of wear, fraying, or damage. Use a flashlight to see into tight spaces and consider using a wire tracer tool to locate hidden breaks.
Using the wrong tools can make the diagnosis process difficult and potentially dangerous. Ensure you have the right tools for the job, as listed earlier. If you’re unsure, consult with a professional or experienced technician.
Working with electrical systems always carries some risk. To minimize these risks, always follow safety precautions, such as disconnecting the battery and wearing protective gear. If you’re unsure about any step, seek professional help.
Checking for an open or shorted wire in a wiring harness is a critical skill for anyone working with electrical systems. By following the steps outlined in this guide, you can identify and fix issues that could otherwise lead to significant problems.
이 웹사이트는 귀하가 당사 웹사이트에서 최상의 경험을 할 수 있도록 쿠키를 사용합니다.
논평
(0)